Posts Tagged ‘gifts’

Hump day crafts: puppet theater

April 6, 2011

It shouldn’t come as a surprise, but my 5 year old daughter, Thing 1, loves to craft. She has her own craft table and hates to throw any of creations away. I thought maybe I’d help her graduate from papercrafts to something a little more durable. Something the Cat will be less likely to throw in the recycle bin. So I asked her if she would like to learn to sew. As if I didn’t know the answer.

For help, we turned to Wendi Gratz’ Shiny Happy World.  I’ve been using her embroidery school videos to help me get a little further with my embroidery skills. Her sewing videos and patterns were just what I needed to get my daughter started. It seems in kindergarten, there’s always a friend’s birthday right around the corner, so we decided to make some gifts. I choose the finger puppets (an affordable pattern from Wendi) and the puppet theater (a free pattern from Wendi). They were simple, but great patterns. We made the pirates and ninjas that Wendy had drawn. Then we got creative and I drew a fairy, mermaid and princess set of finger puppets. (The book How to Draw Fairies and Mermaids was very helpful given my lack of artistic skills.) Thing 1 did much better at sewing than I expected. She never pulled the thread out of needle, kept her stitches right on the line and only stabbed herself one time through the two puppets she completed. Her stitches were a little large and she wouldn’t do any backstitches, but I still was proud of her. And she was proud of herself.

I finished up the other puppets and quickly stitched up the “theater” to hang on tension rods. The only thing I added was some elastic slots to set stick puppets or scenery into. Oh, and of course some bags to gift and store in. But before we wrapped it up, we had to try it out ourselves.

We gave them to one of her best friends last weekend. Although the party was a madhouse (what party for a 6 year old isn’t?), they seemed to appreciate the effort and result. And now Thing 1 wants to sew more so we can have some for our house. I guess she has yet to learn one of the most important things about crafting: you hardly ever get keep anything cool you make.

Happy crafting!

Hump day crafts: vinyled cutting board

January 26, 2011

Not much time for posting right now. I’ve been sick — in fact our someone or other in our house has been sick since the holidays began it seems. I’m really loving cutting permanent/outdoor vinyl (Oracal 651 and GT5 I got from H and H sign supply) with SCAL2 and my Cricut Expression.

Here’s a cutting board I picked up at Walmart and vinyled for my sister’s housewarming gift. I was just going to put “Sweet memories made here”, but thought she might be jealous when everyone else got a personalized tile or glass block, so I added the icons and names. I even drew the cheesecake myself in Adobe Illustrator!

There’s been some discussion over the the SmartBuyGal forums over whether you vinyl the smooth or the pebbly side. After talking (surreptitiously) with my sister, I learned that she’d rather cut on the smooth side, so I vinyled the pebbly side. Not as easy, maybe, but hopefully it makes her happy.

Happy crafting!

Hump day crafts: Glass blocks

December 29, 2010

Christmas is finally over. Well, almost. The Cat still isn’t home, so we have a small cache of presents waiting for his return. It was a tough holiday with him gone. Emotionally, but also just finding time to get everything done. Things 1 & 2 were rambunctious, getting more and more excited for Santa’s visit, while I just needed to find some blocks of quiet time to finish, well, blocks. I found pre-drilled crafting blocks at Lowe’s for the holiday, so I picked a number of them up for presents. I did this with plenty of time left, but, well, my schedule has a way of slipping. I finally finished the last glass block 2 days before Christmas. Actually, I was probably still hot-gluing ribbon on on Christmas eve. Lesson learned, right? Ha! I’m sure next year I’ll be in the same rush those last days before Christmas. It’s just the nature of the beast. The beast being me, I suppose.

And now for the crafts. This first glass block I did for my mom to give as a work gift to a woman who loves penguins. It didn’t turn out as well as I imagined. I don’t think I like the Christmas lights and tinsel with such a delicate design. That is a lesson learned.

And side B:

I etched both sides (masking the edges with tape) and used Oracal 651 vinyl. I put some Stickles on the snowflakes on the Let it Snow side for added bling. The bow was made using a Bowdabra. The penguin is from a coloring page I found on the web, and the “Let it Snow” design is from Michelle over at http://michellesdigitalcreations.blogspot.com/2010/11/let-it-snow.html

So, one down and only three to go to complete my Christmas gifts. Here’s where I got bogged down. But, as I mentioned earlier, I pulled through and ended up thrilled with the results. Here are two I made for my nieces:

Front:

And back:

I did these a little different. On the monogram side, I glued vellum inside the block. (Thanks to rebmac over at SmartBuyGal forums for the vellum tips.) I etched the outside on the other side. Most of the graphics are JPGs that I traced using Illustrator or SCAL2. I’ll have to add a mini tutorial later for the monograms. (hint: I used “exclude” in SCAL2.)

There’s just one more to show here, my nephew’s block for his new Star Wars themed room:

(Thanks to Mardenz for the cut file.) This one I sprayed with Krylon frosted glass finish in pearl gray. I’ve heard that it can scratch off easily (unlike etching which is permanent), but this one shouldn’t be moved around a lot, so hopefully it will be okay. If not, we can always mask the vinyl off and respray it.

For my the last three, I used single C7 bulbs, found with other Christmas lights at Lowe’s, Joann’s and Walgreens. The six-foot cords have on/off switches and the C7 bulb is easily replacable. It’s even easy to take out and swap in a different color. (I put a red bulb in the Vader block.) These were big projects for me, but I’m glad I took on the challenge. I was happy with the way they turned out for the most part. And I think the recipients were all pretty happy too.

Happy crafting!

Hump day crafts: gifts for the coach

December 1, 2010

Thing 1 recently finished her first outdoor soccer season. I wouldn’t say she loved it, but she did love her coach. (She loves practices, but hates the pressure of games.) As the end of season party approached I, of course, had to use my Cricut to pull together some personalized gifts for the coach. I didn’t use SCAL since when I decorated the buckets I didn’t have SCAL yet. I had used Design Studio with the Cricut cartridges Life’s a Beach, Sports Mania and Cuttin’ Up. To keep things the same, I stuck with those cartridges. Another mom bought a “coach” necklace in our team colors that we put inside the mug. It was cute too, and from etsy, but I just don’t do jewelry anymore. That is, I don’t make it. I sure would wear it if I a got it as a gift. (That’s a hint to The Cat.) Enough already, here’s the goods:

The framed photo was a big hit. I brought my Bic markers, so the girls could sign it if Coach Carla wanted — and she did. I wasn’t sure if she would like the clean look or cherish their 4 and 5 year old signatures, so I’m glad I waited. Plus it gave the girls something fun to do at the party (besides eat pizza, get trophies and run around like mad that is.)

Now that I have more vinyl colors I definitely see a lot more vinyled projects in my future. They’re so fun and easy! Happy crafting.

Hump day crafts: Quick paper crafts for The Cat

October 20, 2010

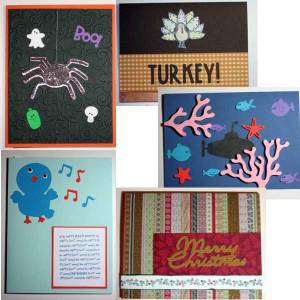
Everytime The Cat goes out to sea on his submarine, I send him with a box of cards and goodies. I try to make sure there’s a card for him to open each week, plus a few extras for holidays and stuff. Here are a few quick cards I created for this patrol:

Oct 2010 patrol cards

I also try to send out a new page for his 6×6 inch scrapbook. I used to struggle to finish the scrapbook page until I discovered collage prints. I can upload 4 photos and have them printed on a 4×6 photo with a colored background. Even a title if I want! When I get it home, I trim a little of the long ends and throw it together with a few embellishments and a cheesy poem to finish off the page. This year Thing 1 started kindergarten, so a first day of school page seemed appropriate. Of course, now I have to do another first day page, since Thing 2 started preschool as well.

6x6 1st day of Kindergarten

Enjoy and happy crafting!

Hump day crafts: Cricut vinyl

July 14, 2010

I haven’t had much time to craft lately, but I have plenty of finished projects to get up here. Today, I thought I’d highlight a few things about working with cricut vinyl. It really doesn’t have to be cricut vinyl. You can buy nice vinyl from a variety of sources (or get free scraps from a sign shop if you’re lucky) or even use contact paper for some applications. But learning to cut this on your cricut opens the door to all sorts of new crafts.

I’m still new to the world of cricut vinyl, but it is just too much fun. I’ve used the vinyl and contact paper to make stencils for all of my glass etching. I’ve decorated water bottles, 3-ring binders, and white boards. Here I’ll detail how I decorated a small notions box to create a personalized gift: a chocolate emergency kit.

First, you’ll need to cut the vinyl. I use a depth setting of 2 with pressure set to medium. For me, this cuts the vinyl but leaves the backing intact, making it easier to work with. You may need to practice getting your settings right. Then you need to weed your design. This is the process of pulling out all the vinyl that you won’t be using. For this design, it looked like this:

cut and weeded vinyl

If you’re using your vinyl as an etching stencil, you’ll want to pull out the opposite — the stuff you want etched. You’ll also need to use your craft knife (or a rectangle in Design Studio) to cut the outside edge of your stencil.

Next, you apply your transfer tape. I have some from cricut, although sometimes I use contact paper in place of my transfer tape. On the plus side, it’s cheaper. On the minus side, I can’t see through it as well when placing my design. I’ve also read that you can’t leave contact paper on it for very long, but you can with transfer paper. I’ve been doing my vinyl projects in one sitting, so haven’t run into this problem yet.

Here’s my project with transfer tape smoothed over it:

vinyl with transfer tape

Use the transfer tape to pull your design off the vinyl backing. Here’s what it looks like from the back:

vinyl with transfer tape - back

Next, you apply the vinyl and transfer tape to your project. You want to be sure to not trap any air bubbles under the vinyl. If you’re putting it on a flat project, it’s not too hard. But you’ve got you’re work cut out for you if it’s going on a curved surface. Occasionally for the etching stencils I’ve had to cut little slits in curves and corners when working on wine glasses and candle holders. In any case, use a credit card, brayer, or other tool to help you smooth the vinyl out.

Once the vinyl’s on there good, get ready to pull the transfer tape off. I find it best to move slowly, pulling back at a sharp angle , with a small tool on hand to hold/push down any vinyl threatening to come up.

pulling off transfer tape

If everything goes alright, one final smoothing should do it for you. Now your project’s ready to go (or ready for etching). My finished project:

finished project

Yes, I filled it with chocolate before presenting it as a gift. And it was much appreciated!

A few things about this project. This the first thing I designed in Cricut Design Studio. It’s not necessarily easy software to work with, but it’s kind of fun. I was working with the trial version, so was limited to using the Plantin Schoolbook cartridge. Also, I tried alcohol inks on the vinyl for the first time ever. I liked the look, and it did not stain my cricut cutting mat. I’ll have to pick up some more colors, so I can play with that more.

I had a tough time jumping in with the vinyl on the cricut. It just seemed so expensive and permanent. (Although many vinyls are removable at least for awhile.) I hope this will inspire someone to make something beautiful. Happy crafting!

Hump day crafts: big word book

June 9, 2010

I’ve been playing with the Cricut Design Studio trial lately. It’s fun, but such a pain coming from such intuitive software (at least after years of experience) like Adobe Illustrator. I made one small word book and was ready to give up on the whole experience and look into Sure Cuts a Lot or a similar software. Then I found this easy-peasy way to make wordbooks on the cricut.com messageboards. Armed with that knowledge, I made a gift for my daughter’s preschool teacher for the end of the year.

I didn’t decorate it, since I only had photos of kids from one of many classes. Instead I let her know she could put her own photos in it or have the kids sign it as a memento of the school year. She was thrilled! I was pretty happy with how it turned out too, since it was such a large word book for me. It’s not perfect, but neither am I. 🙂

There was one helpful hint I would add. If you’re not resizing or smooshing your letters too much, use the shadow feature (if the cart has it) for the book and remember what size you placed your letters at. That makes it easier to cut out letters to go on top later if you like that look.

I used poster board from the Dollar Store and rings from Office Depot to make this. Plantin Schoolbook is the only cartridge I used, since I’m still using the trial version of CDS.

Happy crafting!

Hump day crafts: card gift pack

May 12, 2010

Every once in awhile G’ma hints that she wants me to make her a card for someone. She never really asks, and so I never really get around to it. So, for her mother’s day gift I thought I’d give her a pack of homemade cards. Now, making a card always seems to take me forever, so this is a bigger gift of my time than it sounds. I did get a little smart about halfway through and started making two of the same (or similar) cards at once. The extra time was negligible and it helped build up my stash of cards. (I never have any ready ahead of time, which means I’m always scrambling the day of an event.) I also decorated a little box to hold them all (plus some postage stamps and a nice pen). Below are a few that I included:

    So happy...for you card    

Plus my first card from my Wild Card cricut cartridge, which I just got 2 days before Mother’s Day:   

Happy crafting!

Hump Day Crafts: Electronics Organizer

April 14, 2010

Taking a break from the paper crafts this week. Had to clean off the craft table and drag the sewing machine out to make a few gifts. Here’s one of them: a hanging organizer with pockets for keeping all your electronic charging stuff in one place.

It was a gift for my brother-in-law. I made it, with a few changes, from a free pattern I picked up in the aisle at my local Joann store. I’d love to give you a link to the pattern, but I found searching through their patterns online impossible! It’s not large, only 3 pockets, but I did add a large pocket to the back to hold extra cords and things. If I made another one, I’d probably add a line of stitching to make the large back pocket into two to avoid sagging when full.

The strap on top and the straps holding the power strip have velcro, so it can accommodate hanging anywhere and holding anything. Really, you could take any pocket organizer pattern and add the velcro straps on the bottom to make it an electronics organizer. I hope this gets your creativity and sewing machine moving.

Happy crafting!

Hump Day Crafts: Easel Card with Paper Dolls

February 10, 2010

Our family has a lot of birthdays in January. They tend to sneak up on me after the holidays, so I don’t always get to create something cool for them. But this year, I just couldn’t let them all pass by and leave my cool new tools (yes, I’m talking about my Cricut Expression) sitting idle. So I designed this easel card for my nephew’s 8th birthday.

Looks a little schizophrenic, eh? Well at first, I just wanted to try an easel card, but the siren song of my two Cricut paper dolls cartridges was simply too strong. So I designed a fold out “closet” for the doll’s clothes and accessories and made three “outfits” for the doll.

I’d never made an easel card before, so I started my research at Split Coast Stampers. I decided on making a 6″x6″ card so my 4 inch paper doll would easily fit. This also made it fairly easy to cut from 12×12 paper. I used a 6×12 inch piece of green for the base (scored at 3″ & 6″) and a 6×6 piece of blue for the front. Here’s the inside. (Note the brad in the corner. That’s where I’ve hidden the closet.)

I used foam 3-D dots with a cardstock sentiment (double layered for sturdiness) to hold the card upright. So, the easel part was done, now I had to design the closet. I wanted it to be hidden for the most part, but easily accessible. I decided to place it underneath, with the aforementioned brad as a pivot point for rotating it out.

I cut the paper for the closet at 6″x11″. I scored it at 1″ (which might not have been necessary, but I’d do it again anyway – you’ll see why in the last photo) and 6″. I placed the brad 1/2″ inch from the corner on the card and closet, allowing it to easily rotate out to open.

I wanted to make the closet out of a glossy cardstock, so the reusable adhesive on the back of the doll and accessories wouldn’t pick up fibers from it easily, but I didn’t have any in the house. So, instead I used foil from the kitchen. Strange, I know, but sometimes you have to make do. Besides, I told myself, it looks a little bit like a mirrored closet. Well, if you squint and use your imagination anyway. Here it is with the closet open.

I added a decorative paper clip on the left side to hold the closet in place while the card is folded. And, because of that extra scored line on the closet, you can also use the paper clip to hold the easel card together and stand the whole thing up like this:

Let me tell you, this card was a hoot to make. Paper dolls are probably more fun to make than play with. (Although I hope my nephew enjoyed them a little.) I’ll definitely be looking for more ways to add paper dolls to my cards in the future. Enjoy!