Archive for the ‘Hump day crafts’ Category

Hump day crafts: drawing digistamps again

September 18, 2012

I’ve been working on drawing again — even though it’s my busy season at work, and I really should be spending time doing design and layouts. But there’s always the night before the deadline, right? I’ve been doing a few more tutorials, plus some work with Zenspirations. It’s fun, but I needed to see if I could draw something on my own. My biggest problem is scale. That and where to put limbs on humans and animals. I figured out that if I was having problems I could refer to a photo without actually tracing it. One problem solved (at least partially).

CDAC is having a digistamp challenge this month with a pets with fall (autumn) theme. I submitted a cat jumping after a leaf, but it was disqualified as being too close to the tutorial I followed. Still, I was pretty proud, since I had made some minor changes to the cat:

cat with leaf watermarked

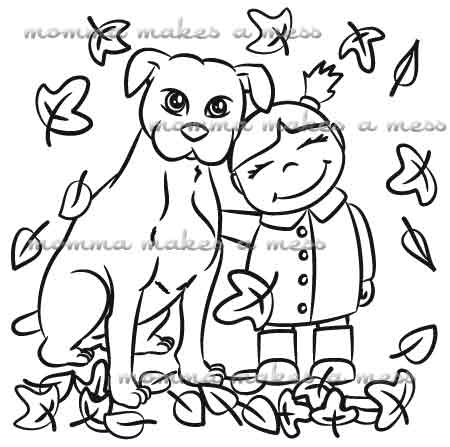
I was pretty happy with it, and being disqualified almost made me walk away from the whole thing. Who was I to think I was talented enough to share my original art, anyway? But, after more thought, I decided to try again. Here’s what I came up with:

Autumn girl with dog watermarkedI can’t say it’s the best thing out there, but I like it. In part because it’s so personal. The idea came from a set of photos from a long time ago, although I shared one just last year. No, it wasn’t autumn (or maybe it was — hard to tell in Hawaii), and they were facing away from the camera, but the photos captured a sweet moment between my daughter and her best friend. Maybe if I can get inspired by moments like this more often I could come up with a lot more original ideas. Well, after I get caught up with work that is.

Happy crafting!

Hump day crafts: drawing digistamps

February 9, 2012

I mentioned my new drawing tablet in the baby shower post earlier. My wonderful sister got it for my for Christmas. It’s not one of those expensive brand name ones, thank goodness, because it’s affordable and works great!! (Find it here.) I’ve been wanting to work on my drawing skills and this is perfect for it. I do my drawing in Illustrator, because I’m not so good at it and it helps me hide that fact.

So, now I’ve got my drawing tablet, but I was either too lazy or too busy to do any drawing. Then up on my radar popped a digital drawing challenge. Over at the Crafters’ Digital Art Center (which I had joined awhile ago) they started challenges for anyone — even beginning artists — to enter digistamps. I was too chicken last month, but I’m gonna put some up this month. Yup, that’s what I’m gonna do. Uh-huh. Alright, already, I’ll just do it. The theme this month is “Critter Comedy or Crazy Characters”. Here’s the first simple one I drew with a baby bird checking out the new arrival:

Simple, yes? Still, I like it. I’m kind of working on trying out different styles I like to see what ones I really feel like I can pull off. My next one was based on a tutorial (like the earlier baby) from DragoArt.  Yes, I’m working through the kids section. Those other ones are really hard! So here’s my crabby valentine:

crabby valentine watermarked

Silly, yes? Well, maybe that’s my style. I guess time will only tell. For a bonus use, I’m using this crab on The Cat’s Valentine’s day card:

You can join CDAC to check out all the other digistamps and even join in the challenge. Have fun!

Hump day crafts: baby shower

January 25, 2012

So, my little adopted sister is having a baby this spring. And she and her boyfriend just moved into a house. So, a party was in order. G’ma was planning it, which meant I was helping. So I designed this invitation:

Well, that’s the front of it anyway. I printed them on double-sided matte photo paper, so they looked good! Yes, I drew the baby, but I’m not really much of an artist. I followed this tutorial using my new drawing tablet for my computer, and then had to do a lot of fixing in Adobe Illustrator. I’m showing this next pic, so that you know that you, too, could do this, because I am so not an artist. Here was my original version of the baby after following this tutorial:

Yup. That’s what the baby started out looking like. But after some retracing, fills, adjusting lines, adjusting points, adding ovals to fill in the eyes, I finally got to my finished baby. No, he’s not perfect, but I was pretty proud. And to make the most of the time I spent on him, I put him on everything. Mini candy bar wrappers, mini peanut butter cup circle stickers, and even table decorations.

Per request, I also put together a matching banner:

…and a few games, including dress the baby (with a talking baby doll) and pin the thing on the baby:

Then, just to save a few bucks and clear a few extra things out of my craft room, I made about a dozen prizes (my other sister added a few more). Some were fun, like “my sippy cup” wine glasses and beer steins and a mustache mirror, but of course I didn’t take photos of those. But here are two I did capture:


Yes, it all was a lot of work. And, although it may sound petty, I was upset occasionally about spending so much time on it. But, when it was done, I had fun and was glad I’d put the effort in to help people enjoy it. After all, isn’t that what half of crafting is about?

Happy crafting!

Hump day crafts: First craft show coming up

December 1, 2011

Oh my goodness! This is a busy week! Not only is it a deadline week for my job over at the Bremerton Symphony, but my sister and I are putting up a table at a craft bazaar at a local church this weekend. Talk about stress! So as not to add to it, this will be a short post. Just thought I’d share a couple of things I’ve been working on and actually had time to take photos of.

Cookies for Santa set. I used the font Buckhorn and a Santa I converted from a coloring page. (I shared the Santa file over on SmartBuyGal forum, because they are so nice over there.)

Night before Christmas charger. This file was shared on SmartBuyGal by a wonderful woman. The font is Christmas Card II. The charger was a DollarTree find.

And, my favorite, the “you’ll shoot your eye out” tumbler. Part of me hopes this one doesn’t sell, so I can keep it for myself. This is a direct steal from the SBG forum.

Wish me luck and happy crafting!

Hump day crafts: circus birthday and photo booth

November 16, 2011

We combined Thing 1 & 2’s birthdays this year — at least for our public party. We wanted to postpone T1’s until The Cat’s submarine got back, and by then it just seemed easier to throw one big party. Easier, ha! I always think these things are going to be simple, but they just have a way of snowballing out of control.

We started with a carnival/circus theme. This was all because we had one bean bag throw game with a clown on it. Such humble beginnings. It ended up being a mini-midway full of games, a photo booth (complete with clown wig), plus a park full of activities. Not to mention the food and decorations.

Our photo booth was popular, even though it was too windy to put up the photo background. People who didn’t care just sat in front of the presents and others moved in front of the trees. We just left a basket of props and Thing 1’s camera on the table, and it was a help yourself activity. The photos that came out of that are my favorite of the day.
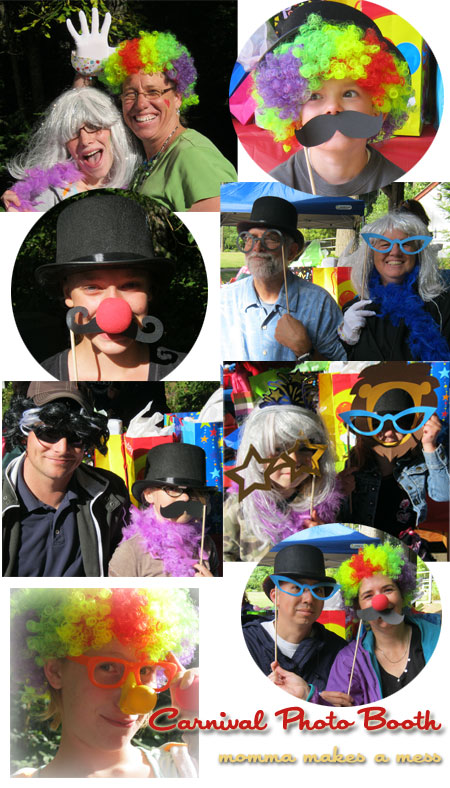
carnival photo booth

Another surprise hit were the balloons. First we got out the rocket balloons. Those are too cool. I highly recommend them for outdoor parties, as long as you have a volunteer to keep pumping them up. We had a teenage boy who patiently pumped while all the younger kids ran like crazy to catch them on their way down. Lots of fun for the preschool through primary grades crowd. We also had balloon sculptures. Nothing fancy. I bought the supplies (balloons and a pump) and printed lots of instructions. I practiced making 1-2 things so I could do it or teach someone else. To my great surprise, one of the families was very skilled at making hats, flowers and what-nots with the balloons. And they were more than happy to help. Hooray! This was a big hit for the kids and the adults who wanted to learn simple balloon sculptures.

We also had face painting, thanks to my sister’s tireless help. Well, I guess she did get tired, but it was time to shut down that booth anyway. Each kid only has so many public cheeks you can paint.

carnival party fun

Besides those ongoing activities, we had a midway full of carnival games. For this, I am eternally grateful to my brother-in-law. While I was trying to set up everything, he asked what he could do to help. Silly boy. I assigned him the games. We had a ball toss, with a clown board with holes, a spin the wheel, and knock down the milk bottles (actually water bottles). He did great at organizing them. And the kids got to win the prizes that filled their goody bags.

Of course, being the busy birthday mom, I didn’t get all the pictures I wanted to of my creations. Like all the circus themed signs for the food and tables. And the cake pops — my first try. They were red, white and blue with red and blue sugar sprinkles. Actually, those probably didn’t actually look that great up close, but from afar they looked cool, and they tasted great!  These were my inspiration.

The cake pops, kettle corn, apple slices, chips, and cupcake cake from Safeway weren’t going to be enough (we had 60-70 people stop by!), so we also picked up cupcakes from Safeway — in our circus colors, of course. I had made these picks to add to the extra cupcakes, with a little help from SVGShop over at MyGrafico. (Hint: sign up for emails about sales.) And, yes, some joker did stick them in the ground when they were done with their cupcakes.

carnival cupcake toppers

This was an extremely fun party. And I had so-so-so-SO much help from friends and family once we got to the park that the day was easier than I dreamed. I hope they all enjoyed themselves as much as I did.

Happy crafting!

(note: although this was published in Oct 2012, I kept the original 2011 publish date, since I had just let it languish in drafts until I collaged some photos.)
Hump day crafts: Halloween party

November 2, 2011

It’s hard not to love Halloween. Candy, alter egos, and scaring the be-jesus out of people is all at least a little bit fun. We don’t generally go all out here, but we have a little bit of fun. This year, for the first time ever, we decided to have a Halloween party. Well, kind of. It was actually just a get together eating junk, making crafts, singing and dancing. Two get togethers. We had an afternoon one for Thing 1’s friends and an evening ‘party’ for family.

Cleaning my house is not my favorite thing to do, so I tried to set it up so we could mostly corral friends in the combined craft/play room. To set the mood, I made an entryway decoration:

I took half of a DollarTree table cloth (the other half was covering our play table to convert it to a craft table) and some black Contact paper, cut with my Cricut, of course. After applying the vinyl, I took my scissors and cut some strips, so people could walk through the door easily.

The kids did make plenty of crafts, although I was so busy running the party, I didn’t get much for photos. We did a pumpkin bookmark:

I cut the pumpkin on the Cricut, added some ribbon and let them decorate them as they pleased. (This one was my example.) We also did yarn ghost pencil toppers (based loosely on these). Oh, and sugar cookies. You just gotta decorate sugar cookies when celebrating a holiday. I’m just happy Thing 1 & 2 are getting to the age where they can participate. I was getting tired of decorating and eating them all myself. 😉

Honestly, it was exhausting, but oh so fun. I’m just glad we’ve got a year before we have to do it again.

Hump day crafts: Where did the summer go?

September 14, 2011

I’m a little sad that my last post had end of the school year gifts and here we are a week into the new school year. Where have I been? And where did my summer go? Last weekend it was in the 80s, this weekend they’re predicting rain and 60s. Bummer. But I’ll get over it. That’s what we moss backs in the Pacific Northwest do.

Even though my summer seems to have ended way too soon, we did get some crafting in. Here’s 10 crafts I did (some with help) during this short summer:

1. Knitted legwarmers – for my niece’s 8th birthday

2. Vinyled clipboards – made one for my sister-in-law as a gift, plus a couple for Things 1&2.

3. Knitted mini-Jayne Cobb hat – gift for my husband. (Yes, we’ve got a teeny bit of Firefly geek in us.)

4. Toilet paper roll joke book – The kids picked and illustrated the jokes to make a book to send to their dad.

5. Screenprinting – actually I should just say buying a Yudu since I’ve only done 2 projects so far.

6. I spy bottle – to entertain the kids on the pier while we waited for The Cat’s submarine.

7. Flannel boards – another pierside entertainer, except that we could only use these on the bus to and from the pier because the wind blew the laminated flannel backed pieces off the board.

8. Tie dye – my 10 & 13 year old niece and nephew visited from the midwest, so we had to break out the tie-dye kit to make some souvenirs. (I was too busy tying and dying to take pics of the process, but maybe I can get some from my mom later.)

9. Crafting for money – I sold some stuff this year — personalized for my mom’s soccer academy. She benefits from marketing and increased word of mouth, I make a little money to put toward a new cutter (hoping to be able to say goodbye to my cricut soon), and the kids get a special one-of-a-kind personalized useful something. I made water bottles for the kids and car decals for the parents.

10. Tenth anniversary print and cut card – I made this with SCAL and my cricut, plus my Canon MX870 printer.

I’d go on with details about each, but the school bus comes early this year, so I better call it a night. You can always post a comment asking for details. Happy crafting!

Hump day crafts: More gifts – vinyl and sewing

June 22, 2011

It’s finally starting to feel like summer’s coming here in the Pacific Northwest, but I used the last few so-so weeks of spring to make some gifts.

First is a tile I did for a friend who was leaving work to have a baby. We worked together for the symphony, and her husband is very into music (he sings in our chorale), so I thought a family/music theme would be nice. I found a couple of sentiments online, and combined them to come up with this:

The tile was just under 8×10 inches and had a white marbled pattern screened on it. I wish I could remember which fonts I used. The script one was PassionsConflict, the serif one I’m not sure. And I wasn’t particularly happy with how it cut on the Cricut. Very inconsistent thickness. Hmmm, maybe I should start saving up for a better cutter. And one that is supportive of third party software that does what I want to do.

(Mini-rant here: I will not buy another Cricut thanks to their litigious actions against small software companies that, in my opinion, made their product better. The only reason I kept the Cricut, which was a gift, was because I knew there was software that would let me cut my own designs. I’ll be researching the BlackCat Lynx, Pazzles Inspiration, Silhouette SD, and other cutters that SCAL will work with. I hope you will do the same.)

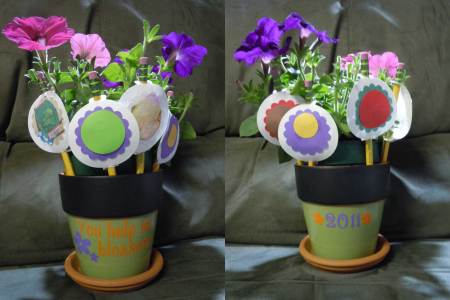
Next was Thing 1’s gift for her kindergarten teacher. We decided on a flower pot with pencils and flowers, so she could decide what it should hold long term. I bought a glazed pot and saucer, slapped on some chalkboard paint, glued them together and added a vinyl sentiment and date. The font was Fantini, and the flowers are from SCAL2’s shape library. (I love the shapes library. It helps me combine the awesomeness of SCAL with the ease of Cricut cartridges.) Then we added some flowers — store-bought and the home-made pencil variety. Here’s a photo before Thing 1 got to add her chalk message:


To hold the flower pot, I sewed an oilcloth tote, inspired by this one from purlbee. I had seen some oilcloth at Joann’s and was coveting a tote for myself, so this was the perfect excuse — uh, opportunity — to buy some fabric. T1 picked the handprint pattern:

I love and hate making teacher gifts, because there are so many neat ideas but I’m worried they’ve gotten them all and the gift will just be thrown in a closet or donation box. While I’m sure the heartfelt gifts are appreciated (my daughter also made a card and wrote a letter), I hope that at least some part of our teacher gifts are somewhat useful.

Oy! It’s been long week, with the extra volunteering in the classroom (dragging Thing 2 along) on top of everything else, so I’ll wait to post the other stuff I’ve been working on. Happy crafting!

Hump day crafts: Gifts for the Cat

June 1, 2011

So the Cat is going out for one last patrol before heading for shore duty here. Usually I buy him a few silly little gifts for him to open while he’s out on the submarine, but this time I decided I’d save the money (he rarely actually uses the gifts) and make him things using my stash of fabrics and yarns.

First off was a computer tote I’ve been thinking about making him since he bought his macbook last year. I had a few placemats I thought were, if not manly-looking, at least gender neutral. They were nice Martha Stewart ones I picked up at Goodwill, and I thought they’d add a little padding with their double thickness. I added additional pockets inside by cutting a piece off a fleece blanket (also from Goodwill) and topping it with a strip from my stash. I handstitched on velcro so the stitching wouldn’t show through on the other side and bought some grey webbing for vertical and horizontal handles. I don’t know if he’ll ever use it (I just read the other day how many men –mine included– don’t like to use stuff that looks homemade) but I would if my computer fit. Unfortunately, I just get his hand-me-downs, so my laptop is too big.

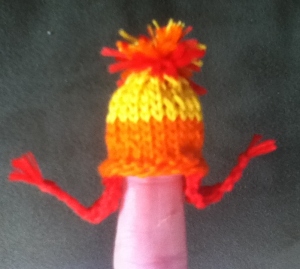
The other gift is just a little hat I knitted because we’re both fans of Firefly/Serenity. It’s a Jayne Cobb hat I knitted with embroidery thread and stuck a magnet on the back. The pattern was on the craftster.org forums, but I found the link through Ravelry. I think it is just adorable! I hope he likes it and is reminded of spending time together — even if it is just watching television.


Happy crafting!

Hump day crafts: felt Kindle sleeve

May 11, 2011

After my last post, I was so inspired by the embroidery and sewing at Shiny Happy World that I thought I’d try something new (for me) for another birthday gift. My sister-in-law got a Kindle as a gift, so I thought I’d sew her up a simple sleeve for those days with complicated cases are just too complicated. (Or have been chewed on by the dog, which has already happened in their house.)

I downloaded a free electronic cozy pattern from Wendi (not currently available), and — inspired by her Rainbow Girls and the book How to Draw Fairies and Mermaids — I drew and embroidered a book fairy on the front. Sure, I need work on doing straight and even stitching (maybe I should get out my little hawaiian quilt and finish it for practice), but I still think it’s kinda cute. Maybe I’ll think of some more cute stuff to embroider.

Happy crafting!